

Your spatial video setup is ready. Now the real work begins: actually shooting footage that looks good in a headset. If you care about how to shoot iPhone spatial video that feels natural and comfortable to watch, technique matters more than anything.
This guide focuses only on shooting techniques, not setup or menus. For setup, see our complete spatial video setup guide. You already turned on spatial video and found the icon. From here it is all about distance, lighting, camera movement, framing, and scene choices.
Spatial video works on iPhone 15 Pro, 15 Pro Max, 16 Pro, 16 Pro Max, 17 Pro, and 17 Pro Max.
You will see what works, what makes people feel sick, and what makes depth pop. We will walk through portraits, birthdays, outdoor shots, action, and the biggest mistakes that ruin the 3D effect. By the end, your clips will actually feel worth rewatching in a headset.
Key Takeaways
Before we dive into how to shoot iPhone spatial video, keep this short checklist in mind. These habits separate flat, uncomfortable clips from ones that feel like real memories.
- Stay in the 3–8 foot window. Keep your main subject between three and eight feet from the phone. Closer than three feet strains the eyes; past eight feet, the 3D effect fades.
- Prioritize even, bright light. Soft, consistent lighting across the frame keeps both lenses clean and reduces shimmer, grain, and color shifts in the headset.
- Treat camera stillness as a skill. In a headset, shaky or tilted footage feels like the ground is moving. Hold the phone steady and level while the action happens in front of it.
- Build foreground, midground, and background. Give every shot a close object, a subject a bit farther back, and a background behind that. Strong layering is what makes depth feel real.
- Avoid the same repeat mistakes. Subjects too close, low light, normal phone-style camera moves, and flat one-layer scenes are the main things that ruin spatial clips. Catch them before you hit record.
How Subject Distance Controls Your 3D Effect
Subject distance drives your 3D comfort level more than any other setting. For most shots, your subject should live between three and eight feet from the iPhone. Inside that range, the two rear cameras create a clean left-eye and right-eye view that your brain can fuse easily.
- Closer than about three feet, parallax becomes very strong. In a headset this forces the viewer’s eyes to cross, which can feel tiring or even painful. It may look fine on the phone screen, so this problem often appears only when you watch on Apple Vision Pro or another headset.
- Farther than eight feet, the two lenses start seeing almost the same thing. Depth cues weaken, and the clip feels closer to normal 2D video. Wide room shots or distant landscapes often fall into this trap.
A quick distance trick: stand where you plan to hold the phone, then reach your arm straight out. That hand is roughly three feet away. A couple of small steps back puts you around five to six feet, which is ideal for people, pets, or a cake on a table.
You can still show the rest of the space, but treat anything beyond eight feet as background, not your star. Think of the three-to-eight-foot zone as a small stage. Your job, every time you record, is to keep important faces, hands, and key objects living inside that bubble.
| Distance From Camera | What It Looks Like In A Headset | What To Do |
|---|---|---|
| 0–3 feet | Too intense, eye strain, feels “in your face” | Step back; do not fill the frame with very close faces |
| 3–8 feet | Natural, comfortable depth | Keep main subjects here as often as possible |
| 8+ feet | Depth fades, starts to feel 2D | Use as background, not as your main subject distance |
Framing Depth Layers For Maximum Impact
Strong depth layering turns a decent spatial clip into one that really feels like you are standing in the room. Start by locking the midground first: place your main subject about four to five feet away, slightly off center. At that distance, faces look natural and the 3D effect feels strong without eye strain.
Next, add a foreground element around the three-foot mark. This might be:
- A hand resting on a table
- A flower in a vase
- A candle
- The back of a chair or sofa
You are not trying to showcase this object; you just want something closer to the viewer that clearly sits in front of your subject. Even a simple coffee cup in the corner makes the frame feel deeper.
Let the true background sit well beyond eight feet. That could be the rest of the living room, shelves, or guests at a party. Treat it like a backdrop rather than something that must feel three-dimensional. A flatter background often helps your subject stand out better in spatial video.
Birthday example:
- Put the cake about four feet from the phone.
- Place one or two candles or decorations closer to the lens at roughly three feet on the near edge of the table.
- Keep guests and room decor behind the cake so they sit as a soft, distant layer.
Portrait example:
- Seat your subject four to five feet away, slightly off center.
- Place a plant or lamp about three feet from the phone along one edge of the frame.
- Let the room behind fall into the background.
Avoid lining everything up at the same distance across the room. One flat depth plane is the fastest way to kill the 3D effect.
Lighting Techniques That Protect Your Stereoscopic Image
Good lighting keeps both iPhone lenses happy and your stereo image clean. Spatial video uses the Main and Ultrawide cameras together, and those sensors respond differently in dim or harsh light. When they see very different brightness or color, the headset image can shimmer or buzz.
In low light, the Ultrawide struggles first. It pushes ISO higher, adding grain and color shifts, while the Main camera still looks okay. When the headset blends those feeds, edges crawl and faces seem to vibrate slightly even when no one moves.
To avoid that, think soft and broad light, not harsh spotlights:
- Indoors, avoid a single bright ceiling light with dark corners. That creates deep shadows and hot spots.
- Try to fill the room with even light, then add one gentle direction, such as a side window or shaded lamp.
Outdoors, midday sun gives you brightness but also sharp shadows. For faces, the best times are when the sun is lower or light clouds soften it. If you must shoot in strong sun, place the sun behind the phone or at about a forty-five-degree angle to the subject, not directly behind their head. That keeps both lenses in a similar lighting situation.
Before you hit record, look at the darkest area of the frame and ask: Would I be happy shooting regular video here without heavy noise? If not, your spatial clip will look worse, not better. Bright, smooth light is the base for every strong stereo shot.
Indoor And Low-Light Shooting Fixes
Indoor and low-light fixes start with where you put your subject. When possible:
- Move people closer to a window and place it to their side at roughly ninety degrees.
- This gives you bright, soft light on one side of the face and gentle falloff on the other that both lenses can handle.
Avoid relying only on overhead ceiling lights. They create deep eye shadows and shiny hot spots on skin. Instead:
- Turn on several lamps around the room.
- Bounce light off a white wall or aim a lamp at the ceiling to lift the overall level.
- Let one window or lamp near eye level add gentle direction.
If you own a small LED panel, set it near 5600K (daylight), place it forty-five degrees to one side of the subject, slightly above eye level, and keep it far enough away to wrap softly across the face. The goal is to give both cameras a clean, low-noise image, not dramatic shadows.
Watch for mixed color light. A warm lamp on one side and cool window light on the other can make the two eyes feel slightly different in the headset. If you see that, either switch off the odd-colored lamp or limit the daylight so everything leans warm or cool, not both.
For birthdays or events indoors, turn on every reasonable light before recording a spatial clip. Place the cake or main subject near the brightest part of the room, not against the darkest wall. Save candle-only moments for normal video or photos; at that level of darkness, spatial video almost always looks noisy and mismatched.
How To Keep Your Camera Still Enough For Spatial Video
Comfortable spatial video depends more on body control than fancy gear. Any shake or tilt feels much stronger in a headset than it did on your phone screen, because the viewer’s body stays still while the view moves. Even mild wobble can cause discomfort.
When you walk with your iPhone in spatial mode, each step becomes a mini earthquake in the headset. Casual handheld motion that seems fine on the phone turns into a swinging, rolling world. Stability here is not just style — it affects how people feel physically when watching.
To keep the camera steady:
- Hold the phone with both hands, elbows gently tucked against your ribcage.
- Keep the phone closer to your body rather than at full arm length.
- If you can, lean your back or shoulder against a wall or door frame to calm small shifts.
Watch the level indicator on screen. Keep that line centered as if you were holding a tray of water. Roll tilt—where the phone is slightly rotated—is especially uncomfortable in a headset because the two eyes no longer agree on what is vertical.
Simple gear helps if you plan ahead: a cheap tabletop tripod, a clamp on a chair back, or even a stack of books with the phone resting against a mug beats freehand. Treat spatial video like a live photograph: the frame holds steady while people and objects move inside it.
The same movement principles apply when you make cinematic videos with iPhone.
When You Need To Move The Camera
Sometimes you do need to move the camera, but the bar is much higher than with normal video. If you pan across a room, move slowly: take at least a four- or five-count to go from one side of the frame to the other while keeping your elbows tucked and your hips still.
Avoid walking shots with the phone in your hands. Even small vertical bounces become big shifts in a headset. If you must move forward or back, use a gimbal with horizon lock and walk with very soft, careful steps, almost like sliding your feet. Keep these moves short.
The safest way to show motion is to let the subject provide it:
- Keep the camera locked in place.
- Have your child run toward you.
- Ask your partner to walk into frame.
- Let your dog jump onto the couch.
The world stays stable while the action unfolds in front of the viewer. Think of each spatial shot like a still photograph with motion inside it. Frame once, set distance and light, lock your body position, and record for ten to twenty seconds. Skip swish pans, fast whips, and quick reframes—they may look fun on a flat screen but are rough to watch in a headset.
Scene-By-Scene Shooting Guide: Portraits, Events, Outdoors, And Action
This scene-by-scene guide shows how to shoot iPhone spatial video in everyday situations. The settings may change, but the rules stay similar: keep distance in range, lock the camera, build layers, and control the light.
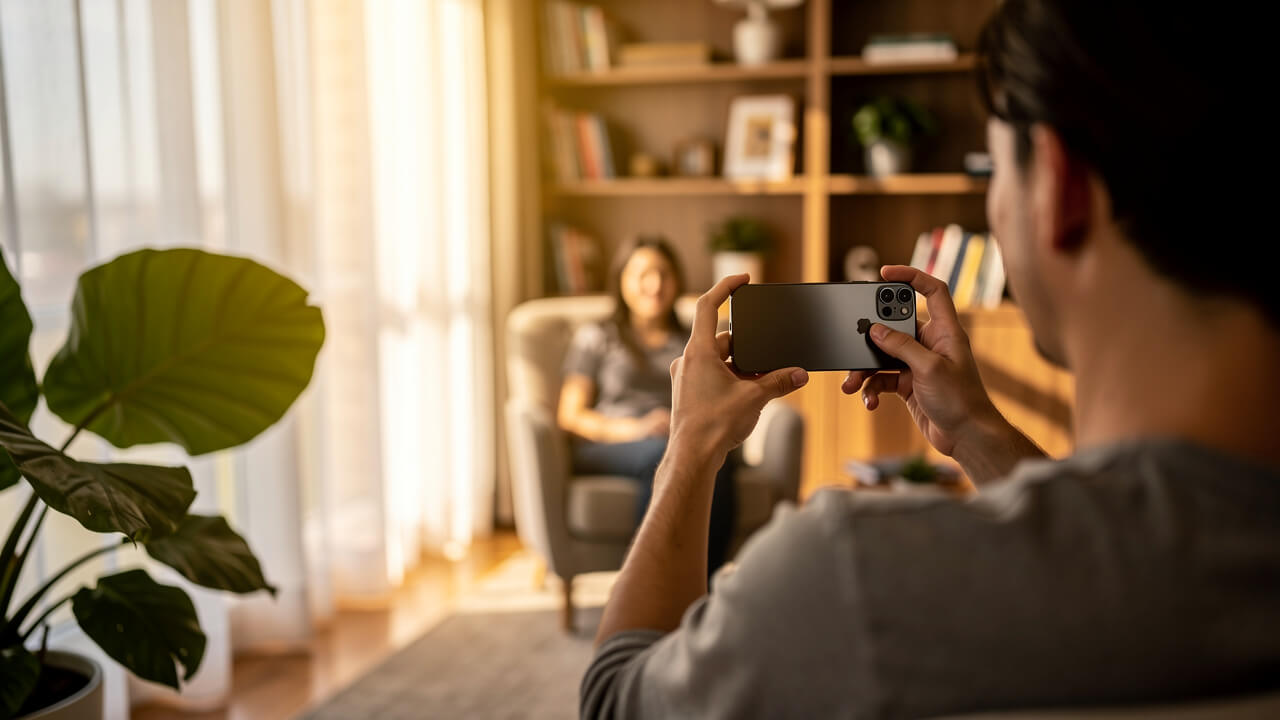
Portraits And Close-Up Subjects

For portraits and close-ups, think of a small stage:
- Place your subject four to five feet from the phone, slightly off center.
- Use a simple foreground object at about three feet—a plant, chair arm, glass, or lamp base.
That closer object does not need to be sharp or prominent; it just helps the headset viewer feel real depth between foreground and subject.
Light the face with a source about forty-five degrees to one side, slightly above eye level (a window, shaded lamp, or small LED panel). This gives gentle shape without deep, crunchy shadows that can distract in stereo. Ask the subject to move slowly—small expressions and gentle head turns look best.
If possible, mount the phone on a tripod. If not, brace against a wall or the back of a chair. Once you see how rock-steady portraits feel in a headset, you will not miss handheld wobble.
Birthday Parties, Events, And Group Scenes

Birthday parties and events are where spatial video can really shine—if you resist the urge to roam.
- Choose one clear focal person (for example, the birthday guest or a speaker) and keep them four to five feet away.
- Use a cake, table, or centerpiece as your three-foot foreground anchor.
- Let guests and decorations fall into the background layer.
Instead of recording long, wandering clips, work in short, stable slices of fifteen to thirty seconds. Frame a strong three-layer shot, record, stop, then move to a new spot and repeat. In a headset, this feels much better than a single long, shaky tour.
Start spatial clips when room lights are fully on. The classic lights-out candle moment is wonderful in person but full of noise and instability for spatial video. Capture that with standard video, then switch back to spatial once lights come back and both lenses can see clearly.
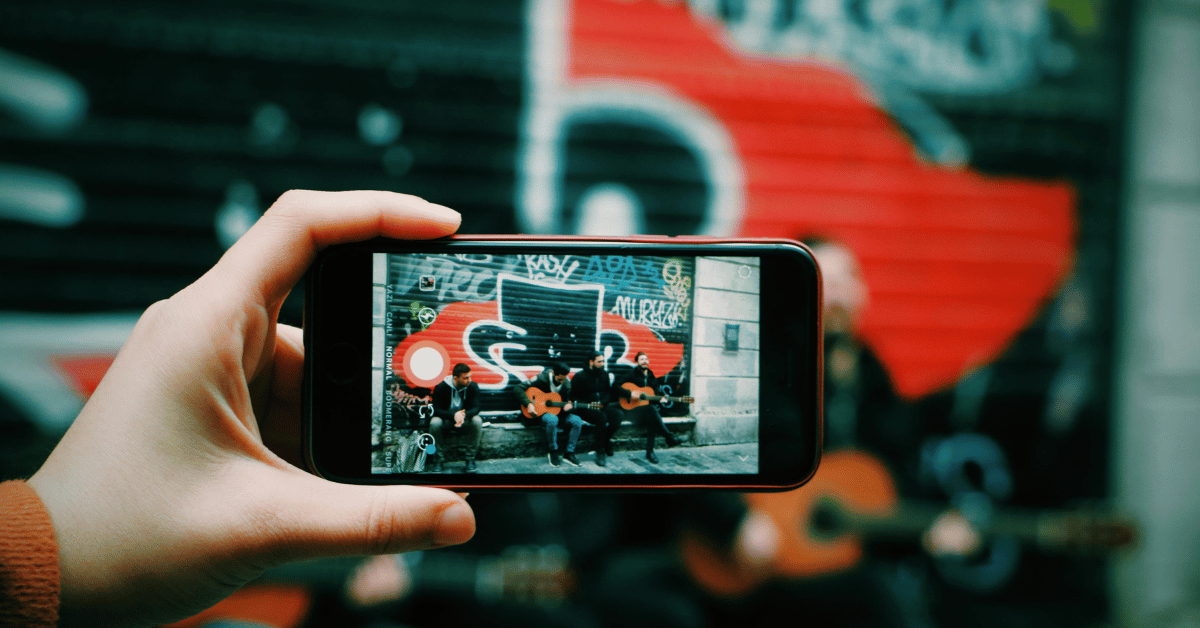
Outdoor Landscapes And Nature
People often expect distant landscapes to look amazing in 3D, but if everything is far away, the headset view feels flatter than you might think. Fix that by always bringing something close into frame.
- Hold the phone so a branch, fence post, rock, or your travel companion’s shoulder sits within three feet along one edge.
- Place your main subject—often a person or small group—around four to six feet away.
- Let the mountains, ocean, or skyline sit behind them as the background layer.
Shoot during golden hour or under thin clouds when possible; soft light keeps both lenses happy and colors rich. If you shoot in harsh midday sun, angle the subject so the sun hits from the front or side rather than directly from behind, which can cause blown highlights and dark faces.
Look for textured backgrounds—trees, water, brick, or city streets. A blank blue sky behind your subject offers few depth cues, even in 3D. A person walking toward you on a path, with trees along the sides and the camera locked in place, is one of the most satisfying outdoor spatial shots you can record.
Action And Movement Shots
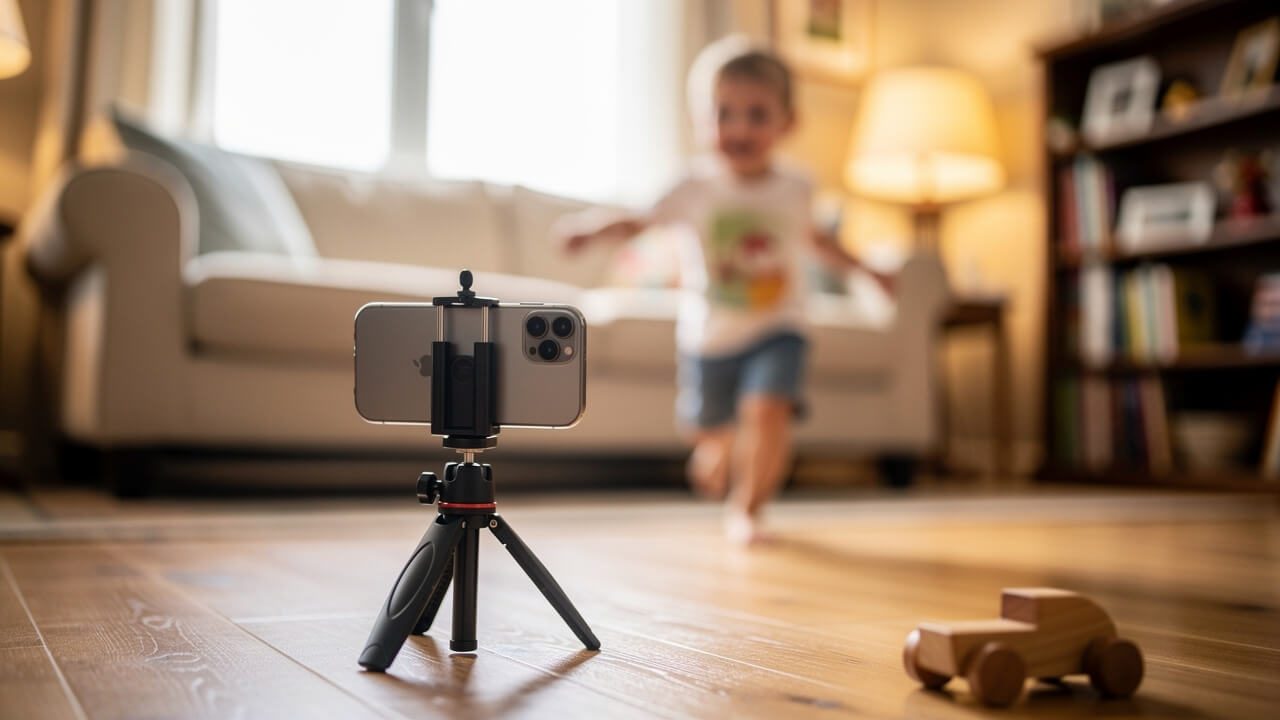
Action and movement in spatial video work best when the subject moves but the camera does not. That is the opposite of the normal urge to chase action with your phone.
Great setups include:
- Someone starting beyond eight feet, then walking or running toward the camera and stopping around four feet away. In a headset, this feels like a smooth, natural zoom.
- Kids playing while you kneel so the phone sits at their eye level. Hold it steady and let them move in and out of the three- to eight-foot zone.
Fast sports are tougher. Tracking a soccer game or cyclist handheld almost always leads to motion sickness in a headset. For sports, pick a fixed angle, frame one key part of the field, and let players run through that slice of space.
Common Spatial Video Mistakes To Stop Making
Most weak spatial clips come from a short list of repeat mistakes. Use this list as a fast check before you press record.
- Shooting in portrait orientation. Spatial video only works in landscape, where the lenses sit side by side. In portrait, the icon disappears and you lose 3D. Build the habit of rotating the phone before you even start framing.
- Putting the subject too close. Filling the frame with a face less than three feet away feels natural on the phone but harsh in a headset. The viewer’s eyes have to work too hard. If you catch yourself leaning in, stop, step back, and reframe.
- Relying on moody, very dark lighting. High contrast looks stylish in normal video but harms spatial clips. One lens adds more noise than the other and the combined image shimmers. If you see deep shadows and bright hot spots, add light and soften the contrast.
- Moving the camera like normal video. Walking, whipping, or fast panning makes the world swing around a still viewer’s head. Lock the phone down and let subjects provide movement. Keep pans slow and rare.
- Shooting everything on one depth plane. When the subject, table, and wall all sit at the same distance, the 3D effect almost disappears. Always add a closer object near the lens and put your subject a bit farther back.
- Recording long, unbroken takes. Ten minutes from the same viewpoint is dull and tiring in a headset. Aim for short clips of fifteen to thirty seconds, each with a clear subject and fresh angle, then stop and reset.
How Cinematic Mode Supports Your Spatial Video Approach
Apple’s Cinematic Mode on the iPhone is a great training ground for thinking about depth and focus before you shoot spatial video. Cinematic Mode gives you shallow depth of field and focus control in 2D, which lines up nicely with how you want to place layers in stereo clips.
When you practice in Cinematic Mode, you learn to separate a subject from the background with blur and framing. That habit carries straight into how to shoot iPhone spatial video: you start putting people in the three-to-eight-foot zone and thinking carefully about what should feel close versus far.
Cinematic Mode also lets you adjust focus after the fact in the Photos app, iMovie, or Final Cut Pro. Tutorials on CinematicMode.com walk through how to pull focus between faces, change depth of field, and guide the viewer’s attention. Those same choices matter in spatial video, but you cannot fix them later, so training your eye in Cinematic Mode first is especially helpful.
If you treat Cinematic Mode as practice, then record a matching spatial version of the same scene, comparing the two clips will quickly show how foreground objects, subject distance, and light work together. Resources from Cinematic Mode and CinematicMode.com give you a simple path to more intentional, dimensional footage across both formats.
The Best Spatial Video You’ll Shoot Comes Down To Discipline, Not Technology
The best spatial video you record comes down to discipline, not hardware. You already own the right iPhone and turned on spatial mode; what matters now is how carefully you apply the basic rules whenever you point the camera at something that matters to you.
Three habits give you most of the gains:
- Keep your main subject between three and eight feet away.
- Use bright, even lighting that keeps both lenses happy.
- Lock the camera and let motion happen in front of you instead of through shaky moves.
Pick one scene type from this guide—maybe a portrait at home or a short birthday moment. Set it up with a foreground object, a four- to five-foot subject distance, and clean light, then record a twenty-second clip. Watch it in a headset and adjust from there. When you want to go deeper on depth and focus tricks, Cinematic Mode and the tutorials on CinematicMode.com are ready to guide your next practice session.
Frequently Asked Questions
Q1: Can You Shoot Spatial Video In Portrait Mode?
No. Spatial video only works in landscape. In portrait orientation, the lenses stack vertically and you lose the left-eye/right-eye separation that 3D needs. The spatial icon only appears when the phone is held horizontally, so rotate to landscape before framing.
Q2: What Happens If Your Subject Is Closer Than 3 Feet?
Anything closer than about three feet makes the 3D effect feel too strong and uncomfortable. In a headset, the viewer’s eyes must cross sharply to fuse the images, which can cause strain or headaches. It may look fine on the phone, so this issue often appears only during first headset playback.
Q3: Does Spatial Video Work Well For Fast-Moving Subjects?
It can—if the camera stays still. Spatial video works best when fast subjects move within the three- to eight-foot window while the phone is fixed. You will usually get better results with people moving toward or away from the camera rather than racing sideways across the frame.
Q4: Can You Edit Spatial Video After Shooting?
Yes. You can trim and share spatial clips in the Photos app, just like regular videos. For depth and focus practice, use Cinematic Mode and tutorials on CinematicMode.com to refine your eye in 2D first. More advanced users can cut and arrange spatial clips in Final Cut Pro on a Mac.
Q5: Why Does My Spatial Video Look Flat Even Though I Shot It Correctly?
Flat-looking spatial video usually means everything sits at the same distance or the subject is too far away. If you skip a clear foreground object and keep your subject beyond eight feet, the 3D effect fades. Reframe with something near the lens around three feet and your main subject at four to five feet, and check that the phone stayed level while you recorded.