

Most iPhone videos look like phone videos. These steps change that — starting with your very next shot.
This guide shows you how to make cinematic videos with iPhone by fixing key settings, choosing the right frame rate, and locking exposure before you hit record. You will also learn how to use Cinematic mode like a real camera feature, choose lenses and light with intent, and color grade for a polished, film‑style result.
By the end, you will have a simple, repeatable workflow you can use for every project, from travel clips to short films, plus pointers to deeper tutorials on Cinematic Mode if you want to go further.
Key Takeaways
- The five most damaging default iPhone settings to change before you shoot
Many default options in Settings push aggressive HDR and compression that work against a film‑style look. Once you switch to Most Compatible format, turn HDR Video off, and lock exposure to about ‑0.7, your footage becomes far easier to grade. Add the Grid and Level overlays and you get cleaner composition without extra gear. These small menu tweaks flip your iPhone from casual snapshot device into a tool you control. - Why Cinematic Mode Is More Powerful Than Most Users Realize
Most people tap Cinematic mode once, see some blur, and stop there. In reality, you can adjust aperture strength, pick who stays sharp, and rack focus mid‑shot just by tapping faces. After you record, you can reopen the clip and change every focus move inside Photos or Final Cut Pro. Used with restraint, it gives your iPhone a real cinema‑lens feel. - The 180‑Degree Shutter Rule And Why It Matters
Natural motion blur comes from the link between frame rate and shutter speed. When you record at 30 frames per second with a shutter of 1/60, movement feels smooth and film‑like. Let the phone push shutter into the thousands and you get harsh, stuttery motion. Knowing this single rule, and how to set it, changes the entire feel of your footage. - How Lighting Angle, Not Gear, Separates Amateur From Cinematic
Expensive rigs cannot save flat, midday light on a face. If you avoid noon sun, shoot in early morning or late afternoon, and place your subject so the brighter side of the light sits behind or beside them, you create depth and shape. This “shadow side” habit matters more than which gimbal or tripod you buy. - How To Color Grade iPhone Footage For A Finished, Professional Look
Flat Apple Log clips look gray by design, yet they hold a lot of detail. A simple Color Space Transform in DaVinci Resolve, a little work on Lift, Gamma, and Gain, plus a gentle LUT and film grain can change that flat file into a rich final image. Even Cinematic mode clips gain a more polished style once you add contrast and control highlights carefully.
Step 1: Configure Your iPhone Camera Settings Before You Shoot Anything
Step 1 for how to make cinematic videos with iPhone is to fix your core camera settings before you record a single frame. Right now, your iPhone likely favors HDR display tricks and tiny file sizes, which work against a clean, gradable image.
ProRes and standard H.264 behave far more predictably in editing apps than HEVC with dynamic HDR. So your first job is to switch formats, tame HDR, and give yourself solid composition guides.
Turn Off HDR Video And Switch To “Most Compatible” Format

You start inside the Settings app, because format choices there decide how your footage behaves later in Final Cut Pro, DaVinci Resolve, or LumaFusion. Open Settings → Camera → Formats and change the top option from High Efficiency to Most Compatible. This tells your iPhone to create standard H.264 files with wide support in every major editor, rather than HEVC clips that often look different outside Apple apps.
Next, go to Settings → Camera → Record Video and toggle HDR Video off.
HDR Video pushes heavy tone mapping that may look flashy on your iPhone display, yet it bakes in wild highlight decisions that you cannot fully correct in post. With HDR off, the image you see on a standard Rec.709 screen will match far more closely to what you grade. That gives you consistency between your phone, laptop, and client monitors.
Back out to Settings → Camera and enable Grid and Level. The grid divides your frame into thirds and helps you place eyes and horizons with intention, while the level keeps handheld shots straight. These guides cost nothing, yet they train your eye to frame like a filmmaker rather than a casual snapper. Over time, this habit does more for your cinematic iPhone video results than yet another accessory.
Lock Exposure To -0.7 To Protect Your Highlights
The next fix protects skies, windows, and practical lights, which iPhone loves to blow out. Go to Settings → Camera → Preserve Settings and turn on Exposure Adjustment. This tells the Camera app to remember your last exposure compensation instead of resetting every time.
Now open the native Camera app, choose Video, and tap for focus anywhere in the frame. Beside the focus box you see a small sun icon. Slide your finger downward to set exposure compensation to about ‑0.7. This slight pull down forces the phone to favor highlights instead of lifting shadows too far. Once you do this, your skies keep texture and bright signs keep their detail.
The default auto exposure often brightens the whole image so faces look clear, but it sacrifices highlight data that no color grade can bring back. With the ‑0.7 baseline, you may lift shadows a little in editing, yet your brightest areas stay intact. Viewers notice blown highlights far more than soft shadows, so this one adjustment instantly improves perceived quality.
Before every serious shoot, run this quick checklist:
- Formats: Most Compatible
- HDR Video: Off
- Grid / Level: On
- Exposure compensation: Around ‑0.7 saved with Preserve Settings
Step 2: Choose The Right Codec, Resolution, And Frame Rate
Step 2 focuses on your recording format so the files actually hold up in editing and playback. You will pick the right codec, stick to 4K, and set a frame rate that fits iPhone hardware.
For iPhone 15 Pro or newer, that often means Apple ProRes Log through the Blackmagic Camera App. For older phones, it means high‑bitrate H.265 or H.264 with clean exposure. Either way, 4K at 30 frames per second gives you smooth motion and flexibility in post.
Here is a quick reference you can keep in mind:
| Setting Choice | Use This | Why It Helps Cinematic iPhone Video |
|---|---|---|
| Codec | ProRes 422 LT | More color detail, easier grades |
| Resolution | 4K | Sharper image, better downscale to 1080p |
| Frame rate | 30 fps | Smooth motion, easy 80 percent slow clips |
Shoot In Apple ProRes Log If Your iPhone Supports It
If you own an iPhone 15 Pro or newer, you can step into a more professional format. Install the free Blackmagic Camera app from the App Store and open it. In the codec settings, select Apple ProRes and choose 422 LT. This flavor strikes a strong balance between quality and storage, unlike 422 HQ, which fills internal space and SSDs at a rate most creators cannot handle.
Within the same menu, turn on Apple Log. Log color looks flat, gray, and low contrast on purpose. That flat look preserves highlight and shadow detail that grading apps such as DaVinci Resolve can use later. 10-bit Log files hold far more color data than standard 8-bit clips, which reduces banding and strange posterization when you push colors.

If you hit storage limits or shoot a long event, pick H.265 at maximum bitrate in the Blackmagic Camera app. H.265 compresses harder yet still looks very clean for social platforms and YouTube. The rule is simple:
- Use ProRes 422 LT for important projects where you can offload footage to external drives.
- Use H.265 max bitrate when space is tight but you still care about image quality.
Set Your Frame Rate To 4K 30fps (Not 24fps)
Set your base project to 4K resolution and 30 fps frame rate. In the Blackmagic Camera app, tap the frame‑rate icon and choose 30, then confirm resolution is 4K. While classic cinema favors 24 fps, iPhone sensors often show slight stutter and uneven motion at 24, especially in ProRes Log. At 30 fps, motion looks smoother without feeling like a TV soap.
For your edit, you have options:
- Keep a 30 fps timeline and play clips at normal speed for clean motion.
- Drop those clips on a 24 fps timeline and slow them to 80 percent speed for a gentle, dreamy feel that also smooths handheld bumps.
- For heavier slow motion, set the camera to 4K 60 fps (or higher frame rates if your iPhone supports them) and slow that to 50 or 25 percent on a 30 fps timeline.
4K uploads hold up better after platform compression which helps fine detail and gradients hold up after compression. So even if your final delivery is 1080p, capture at 4K 30 fps, then downscale in the edit for a sharper, more cinematic final image.
Step 3: Master The 180-Degree Shutter Rule And Use An ND Filter
Step 3 gives your footage natural motion blur, which separates film‑style video from harsh, phone‑style clips. You will match shutter speed to frame rate, then use a neutral density filter so that setting still exposes correctly in bright light.
Once you control this, every pan, walk, and hand gesture feels smooth instead of crunchy. Many beginners skip this rule and wonder why their expensive phone still looks cheap.
Calculate Your Shutter Speed And Lock It Manually
The 180‑degree shutter rule says shutter speed should sit at twice your frame rate. If you record at 30 fps, set shutter to 1/60. If you record at 60 fps, set shutter to 1/120. That ratio creates just enough blur on each frame so motion feels natural, like a movie shot on an Arri or RED.
Open the Blackmagic Camera app. Tap the shutter value at the bottom and type in 1/60 for 30 fps, or 1/120 for 60 fps. Make sure the shutter label turns white or shows a lock icon, which means it no longer changes on its own. Now exposure will adjust only through ISO and ND, not by secretly raising shutter to extreme values.
If you leave everything on auto during a sunny day, iPhone often climbs to 1/2000 or even faster to avoid clipping, which kills motion blur and turns movement into a choppy mess. By forcing 1/60, you keep that soft blur on hands, hair, and cars. Nearly all major films still rely on this rule, so you are now matching the same motion logic with your phone.
Attach A Variable ND Filter For Outdoor Shooting
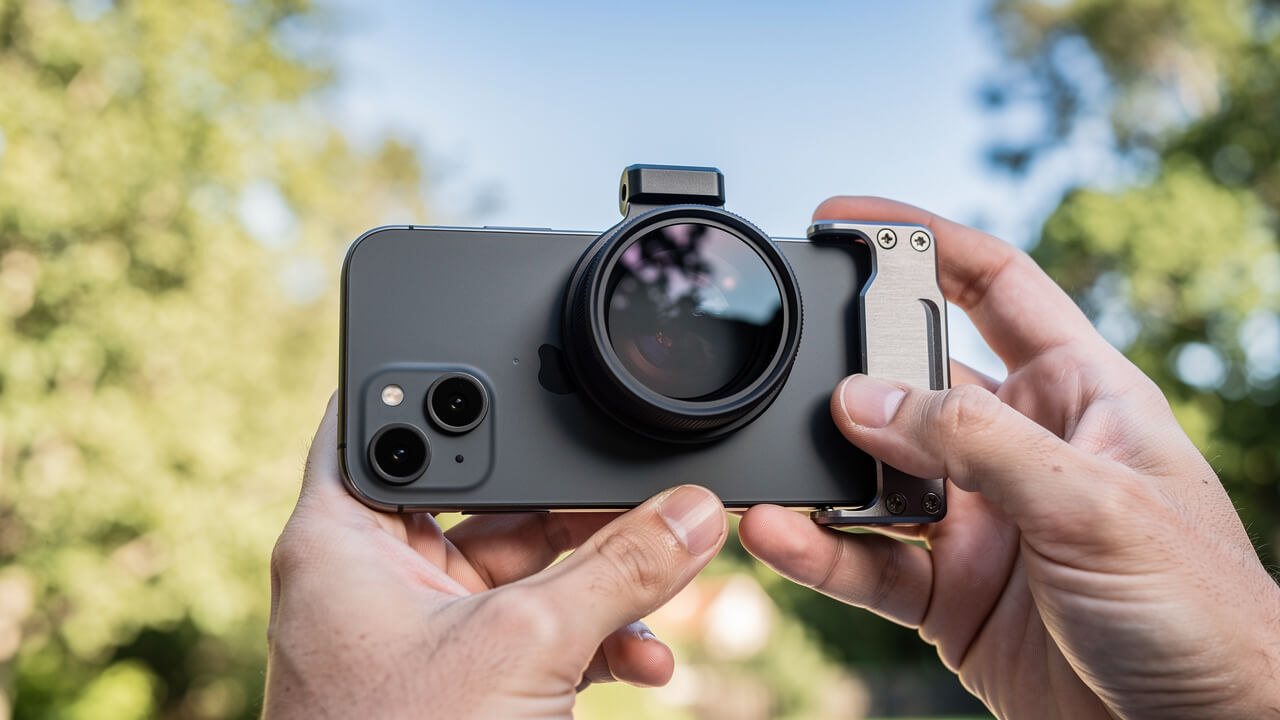
The moment you lock 1/60 under bright sun, your image will probably blow out to pure white. That is why you need a variable ND filter on the phone. Think of ND as sunglasses for your lens. It cuts the amount of light that hits the sensor so you can keep your preferred shutter speed and aperture.
For a clean rig, use a Freewell magnetic case or similar system that lets you snap ND filters on and off fast. Attach the case, mount the ND, then open the Blackmagic Camera app with shutter at 1/60. Now rotate the ND ring until the image looks correctly exposed with highlights still under control. You adjust light in the real world instead of by wrecking motion blur.
Without ND, the phone has only two bad options. Either it respects 1/60 and blows out highlights, or it ramps shutter into the thousands and gives you sterile, video‑ish motion. In run‑and‑gun situations where you cannot use filters, fall back to the native Camera app with your ‑0.7 exposure trick to protect highlights. It is not perfect, yet it still looks better than auto exposure with wild shutter.
Step 4: Use iPhone’s Cinematic Mode The Right Way
Step 4 focuses on Cinematic mode inside the native Camera app, which mimics shallow depth of field and rack focus. Used with intent, it can make quick social clips feel like scenes from a short film.
Most people leave it on full auto and accept whatever blur the phone picks. You will instead control focus, aperture strength, and even change those choices later in the edit. Cinematic Mode, the training brand at cinematicmode.com, has full walkthroughs of these tricks, yet you can start right now with the basics below.
How To Control Focus And Depth Of Field During Recording
Open the native Camera app and swipe along the bottom until you reach Cinematic. Before you start, tap the f icon in the corner. A slider appears that controls blur strength. Set it near f/4 or f/5.6 for a natural look; lower values like f/2 give a heavy blur that can feel fake on busy backgrounds.
When a face appears, the phone draws a yellow frame around the subject it keeps sharp and gray frames around other detected people. Tap a gray box to shift focus smoothly to that person. This creates a rack focus effect that feels very close to what a focus puller does on set with cinema glass. If you want focus to stay locked, tap the subject again until the frame shows as locked, so the phone does not hunt if someone crosses the frame.
For objects or static scenes, tap and hold on the area you want in focus until you see AE/AF Lock. Now both focus and exposure stay fixed, so you can move the camera or wait for action without sudden jumps. On recent Pro‑level iPhones with dedicated camera controls, you can also use hardware buttons or dials to shift focal length and depth strength while you shoot, which feels far more tactile during handheld work.
Edit Focus Points After You Record
The real secret of Cinematic mode is its editable depth data. After you shoot a clip, open the Photos app, find the Cinematic video, and tap Edit. You will see a timeline with small focus indicators along the bottom. Tap anywhere in the frame at a given moment to pick a new subject, and the app recalculates blur for that entire segment.
You can drag the focus keyframes along the timeline to slow down or speed up a focus shift. Tap the f slider again during editing and move it higher to reduce blur or lower to increase it. This means if you went too heavy on blur on set, you can dial it back later to avoid that cardboard‑cutout look around hair and ears.
If you miss a focus move during the shoot, you can add it now with a tap instead of throwing out the take. This is the biggest advantage Cinematic mode holds over large‑sensor cameras where focus is fixed once you roll.
For more advanced focus techniques, see our iPhone Cinematic Mode tips guide.
Just remember, depth effects work best when they support the story:
- Save big blur shifts for moments that matter.
- Keep backgrounds a bit more visible during normal dialogue so the frame still feels grounded.
Used this way, Cinematic mode becomes a storytelling tool rather than a gimmick.
Step 5: Choose The Right Lens And Light For Every Shot
Step 5 is all about lens choice and light direction, two factors that matter more than any app setting. The same iPhone can look like a movie camera or a webcam purely based on which lens you pick and where you place your subject relative to the sun.
You will use the 1x lens as your default, save telephoto for strong daylight, and reserve the ultra‑wide for specific tasks. Then you will time your shoots for soft light and learn to “work the shadow side” for depth.
Use The 1x Lens As Your Default — And The Ultra-Wide Strategically
On modern Pro iPhones, the 1x lens (about 24 mm) uses the largest sensor and the brightest aperture. That gives you cleaner low‑light performance, smoother noise, and better dynamic range. For about 90 percent of your shots, stick with 1x. It looks the most “cinema” and behaves best with ProRes Log.
The 2x and 5x telephoto lenses help when you need a tighter frame without walking closer. Use them in strong daylight or bright studio setups, where there is plenty of light for those smaller sensors. In shade or indoor scenes, telephoto lenses often produce muddy blacks and extra noise, which screams smartphone. For tight portraits after sunset, you will usually get a nicer look by staying on 1x and stepping closer.
The 0.5x ultra‑wide (about 13 mm) shines for three cases. First, big outdoor scenes where you want scale. Second, fast tracking shots, such as running next to a skateboarder, where the wide field of view hides shake. Third, macro‑style B‑roll: push the lens within an inch or two of a logo, keyboard, or screen and you get bold close detail. When you mount the phone on a tripod or SmallRig magic arm, turn software stabilization off in Blackmagic Camera so it does not invent tiny wobbles on a truly static frame.
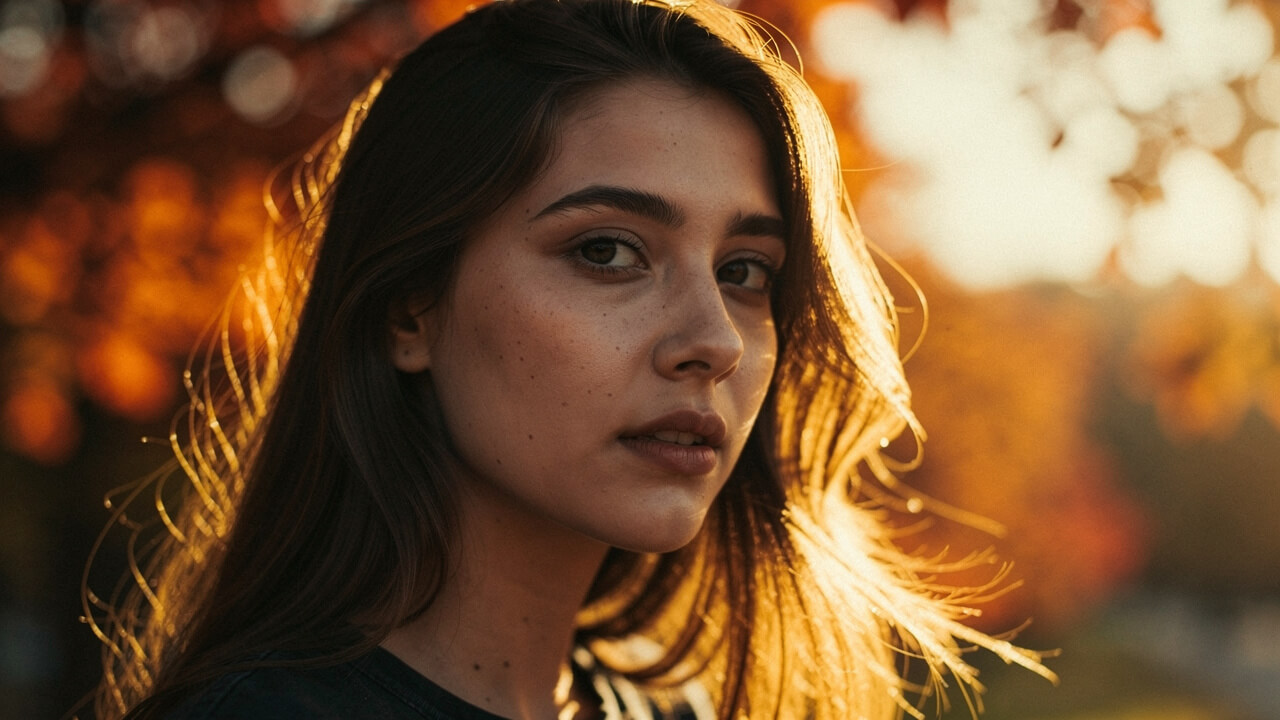
Shoot During Golden Hour And Work The Shadow Side
No camera trick beats good light. Avoid direct sun between 10 AM and 4 PM, especially for faces. Overhead light creates dark eye sockets, shiny hot spots on foreheads, and flat backgrounds. Unless clouds fully cover the sun, treat midday light as your last choice for anything important.
Plan your key shots between 8 and 9 AM or 6 and 6:30 PM, when the sun sits lower in the sky. During these “golden hour” windows, light passes through more atmosphere, which softens shadows and brings warm tone to skin. Walk your subject in a circle until you see one side of their face with light and the other with gentle shadow. That angle gives you natural contrast without extra gear.
Then place yourself on the shadow side of the face, with the sun behind or off to one side of your subject. Now the bright edge light traces shoulders and hair while the camera mostly sees smooth shadow and midtone. This single habit makes your footage feel far richer. Cinematic Mode teaches the same idea across its tutorials, because once you feel how light direction changes depth, you rarely go back to flat, front‑lit setups.
Step 6: Compose Your Shots And Move The Camera With Purpose
Step 6 teaches you to frame shots with clear structure and only move the camera when that move adds meaning. Random pans and tilts reveal “phone video” faster than any technical flaw.
You will rely on the built‑in grid for the rule of thirds, look for leading lines, and layer foreground, subject, and background. Then you will choose push‑ins, pull‑outs, or tracking moves with simple rules instead of habit.
Frame Every Shot Using The Grid And Leading Lines
First, make sure Grid is enabled in Settings → Camera. When you open the Camera or Blackmagic app, you see two vertical and two horizontal lines. Place your subject’s eyes near one of the four intersection points instead of dead center. This off‑center placement instantly feels more composed.
For wide shots, avoid splitting the frame in half. Let the horizon sit on the top or bottom grid line depending on what matters more — sky or ground. Then search for leading lines such as fences, sidewalks, or window rows that point toward your subject. Align the shot so these lines guide the viewer’s eye through the frame toward the main action.
Add depth by stacking the scene. Put a plant, doorway, or person slightly out of focus in the foreground, your subject mid‑frame, and buildings or streets in the back.
Move The Camera Only When You Have A Reason
Camera movement should support the story, not show that you can move the phone. Avoid casual sweeps left and right just to “show the room.” Those pans rarely add information and often create motion blur that distracts from your subject.
Instead, pick one of three clear moves:
- Push in toward a subject when tension rises or an important detail appears.
- Pull out to reveal more of the scene and give context, such as the size of a crowd or the setting around a character.
- Track alongside someone who walks or runs to place the viewer beside them, which feels immersive.
If your planned move does not match one of these reasons, shoot a still frame instead.
On a tripod or magic arm, turn stabilization off so the frame stays rock solid. Let movement live inside the scene rather than inside the camera. That contrast between stable framing and moving subjects creates a controlled, cinematic look that feels deliberate instead of shaky.
Step 7: Color Grade Your iPhone Footage To Finish The Look
Step 7 takes your flat or straight‑out‑of‑camera clips and gives them a final, film‑style polish. You will see how to convert Apple Log properly, shape exposure, and add subtle effects such as halation and film grain.
For ProRes Log, DaVinci Resolve on Mac or PC offers the strongest toolset. For quick edits, you can still apply basic contrast and LUTs inside Final Cut Pro or even the Photos app. Cinematic Mode shares full grading walkthroughs, yet this section gives you a foundation you can use right away.
Even though this quote refers to audio, the idea applies to color too.
Convert Apple Log In DaVinci Resolve Using A CST Node
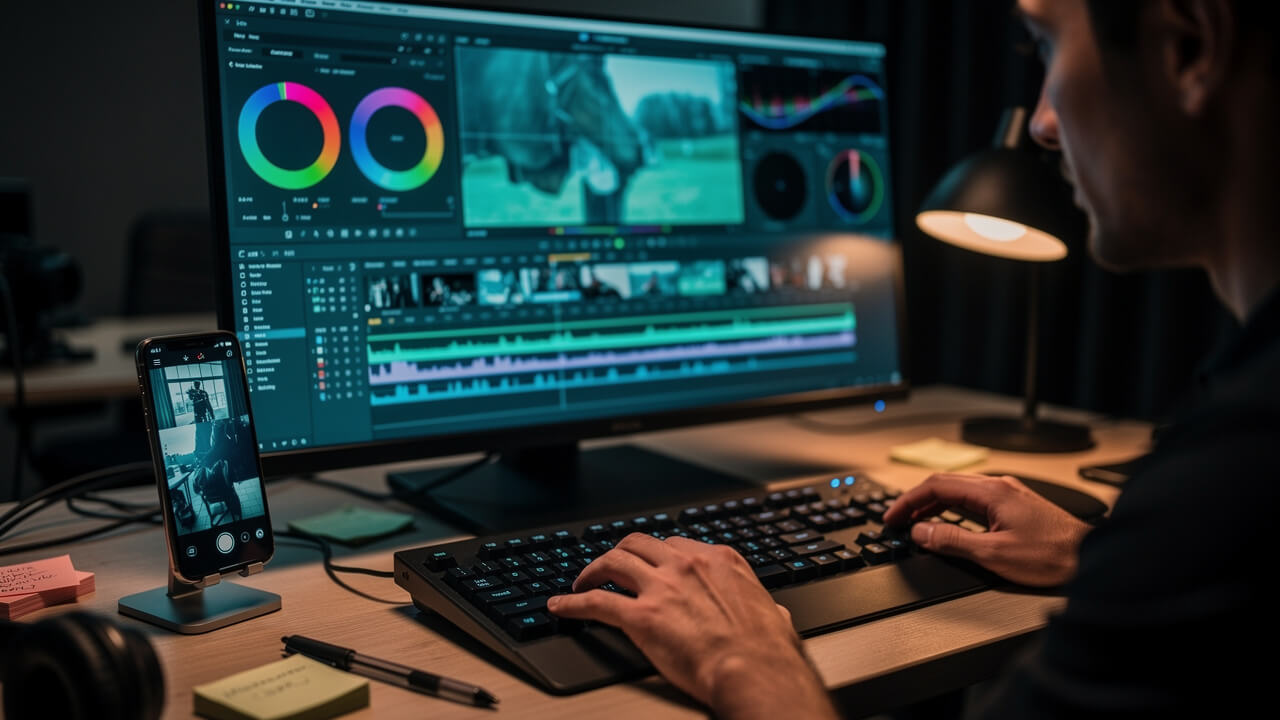
Import your Apple Log ProRes clips into DaVinci Resolve and go to the Color page. Create a new node and apply a Color Space Transform (CST). Set Input Color Space to Rec.2020 and Input Gamma to Apple Log, then set both Output values to Rec.709. This single step moves your footage from flat gray to a normal viewing space.
Next, use the Primary Wheels. Pull Lift down until the darkest parts sit just above zero on the waveform, so blacks look rich but not crushed. Raise Gain until highlights reach a pleasant peak without clipping faces or skies. Then nudge Gamma to place skin tones in the middle of the waveform around the 40 to 60 percent range. Now your clip has healthy contrast and natural brightness.
From here, add a creative 709 LUT on a later node. That LUT might mimic Kodak film, lean warm for sunset, or cool down shadows for a moodier style. For fast edits, you may use a combination LUT that both converts Apple Log to Rec.709 and adds a creative grade at the same time. This approach offers a simple yet reliable path to cinematic color without custom curves or advanced math.
Add Film Grain, Halation, And RSMB To Polish The Final Cut
Once base color feels right, you can hide some of the sharp, overly clinical edge common to smartphone sensors. Add a film grain effect at a low strength, just enough so flat areas of color show a slight texture. This breaks banding and makes gradients, such as skies, feel more organic.
Then add Halation if your grading tool offers it. Halation makes bright highlights bleed a gentle red or orange halo into nearby dark areas, similar to what happens on real film stock. Pair that with a touch of Bloom, which softens the strongest highlights, and you get a smoother highlight rolloff without physical mist filters on the phone.
If you had to shoot outside with high shutter speeds and no ND, the motion might look too crisp. Drop the RSMB (Real Smooth Motion Blur) plugin on those clips and let it analyze movement to synthesize blur. This can rescue action shots that would otherwise feel amateur. For fast social output, the Blackmagic Camera app even offers Record LUT To Clip, which bakes your chosen look straight into the file so you can post right from the phone without a grading session. According to Musicbed, viewers respond best when strong visuals pair with thoughtful audio, so combine this visual polish with high‑quality, licensed music for a full‑cinema feel.
The Bottom Line: Your iPhone Is Already A Cinema Camera
Your iPhone already has the hardware and software to create film‑style work; it just needs the right settings and technique. With the steps above, you have a complete iPhone filmmaking guide that runs from menu tweaks to final color. Learn exactly when to use Cinematic Mode vs Video Mode for different scenarios.
You fixed formats, frame rate, shutter, and exposure. You used Cinematic mode as a true creative tool, not a toy, and you leaned on light, composition, and color to finish the look. Cinematic Mode at cinematicmode.com can now serve as your deeper reference when you want to go beyond this first project.
Conclusion
You now know how to shoot cinematic iPhone video without buying a bag of gear. Start by changing three things before you close this tab: in Settings → Camera → Formats, choose Most Compatible, turn HDR Video off, then lock exposure to about ‑0.7 in the Camera app. Next time you record, set 4K 30 fps, lock shutter near 1/60 in Blackmagic Camera, and pay attention to where the light hits your subject.
Use the 1x lens as home base, compose with the grid, and move the camera only when that move supports the moment. Finally, give your clips a basic grade in DaVinci Resolve or your editor of choice so they look intentional, not random. Follow this checklist for your very next shoot and your iPhone stops feeling like a toy and starts acting like a real camera.
Frequently Asked Questions
Can I Make Cinematic Videos With An Older iPhone That Doesn’t Support Cinematic Mode?
Yes, you can still create film‑style clips with an older iPhone that lacks Cinematic mode. Use the 1x lens, set 4K 30 fps, and apply the ‑0.7 exposure lock to protect highlights. Focus heavily on good light, clean composition, and stable support. Check our complete list of iPhones that support Cinematic Mode to confirm your model. The Blackmagic Camera app provides manual control and higher quality codecs on many older devices.
Do I Need A Gimbal To Shoot Cinematic iPhone Video?
No, a gimbal is helpful but not required for cinematic video. The 1x lens with software stabilization handles most walking and simple tracking moves if you keep your steps slow and steady. A mini tripod or magic arm covers locked shots on tables, railings, or cars. For ultra‑wide tracking clips, bend your knees, hug the phone to your body, and let your body act as the stabilizer, with stabilization off on rigid mounts.
What’s The Difference Between Cinematic Mode And Shooting In ProRes Log?
Cinematic mode uses computational depth maps to blur the background and shift focus between subjects, all inside the iPhone chip. ProRes Log is a recording codec and color profile that stores a flat, high‑detail image for serious color grading later. Cinematic mode mainly controls depth of field and focus style, while ProRes Log aims at maximum dynamic range and flexibility in post. Many creators use both, each for different projects.
Should I Use The Blackmagic Camera App Or The Native iPhone Camera App?
Use the Blackmagic Camera app when you want full manual control of shutter, ISO, white balance, ProRes Log, and on‑screen LUT previews. Use the native Camera app when you want quick capture, Apple’s Cinematic mode, or extremely simple operation under time pressure. Both options are valid tools. Pick based on how much control you need and whether you plan a full edit in DaVinci Resolve or a fast cut on your phone.
How Do I Lock White Balance On iPhone Before Recording?
In the Blackmagic Camera app, tap the white‑balance readout, select a preset such as Sun or Cloud, or type a Kelvin number to lock it. In the native Camera app, tap to focus, then tap and hold until AE/AF Lock appears; white balance stays tied to that locked point. Avoid long clips on Auto White Balance, because shifting color tones within a single shot makes grading far harder.
Can I Color Grade Cinematic Mode Footage The Same Way As ProRes Log?
Not quite, because Cinematic mode records compressed H.264 or H.265 rather than a Log profile with extra dynamic range. You can still adjust exposure, contrast, and color inside the Photos app, Final Cut Pro, or DaVinci Resolve, but heavy pushes will break faster than they do on ProRes Log. Focus your grade on moderate contrast tweaks, highlight control, and a gentle LUT so you keep the depth effect clean without banding or noise.